
We try to always have some version of AAC close at hand. We are usually very good about making sure not to leave home without my daughter’s talker or some version of low tech AAC for her to communicate – whether it be a coreboard on a lanyard, or an apron with core and fringe vocab, AAC kickboards for the pool, etc. Where we are perhaps not as good at always remembering is when we are outside in the yard at home.
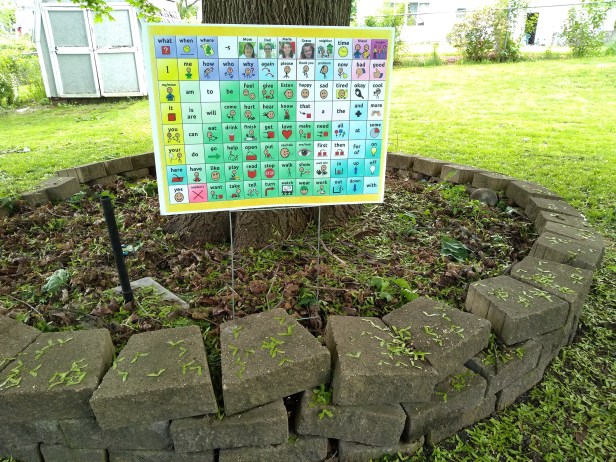
A few years ago I saw the idea of having a coreboard printed on a yard sign on one of the various AAC facebook groups that I follow. I immediately had one printed up at Office Depot and we have been using it in the classroom for our homeschool enrichment program ever since. This year I got the idea to have a new one made and actually use it outside – it is weather resistant and a “yard sign” after all so why not use it in the backyard?
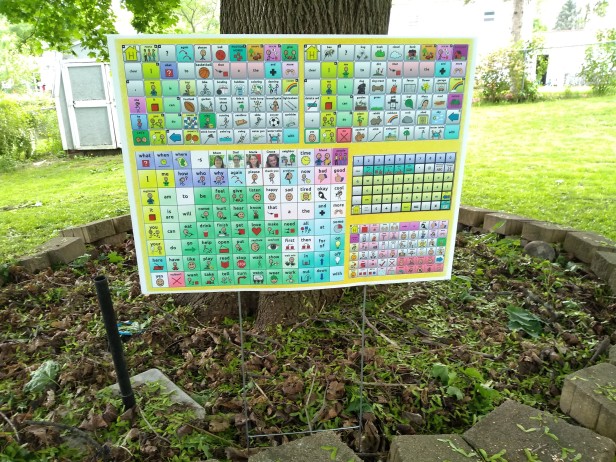
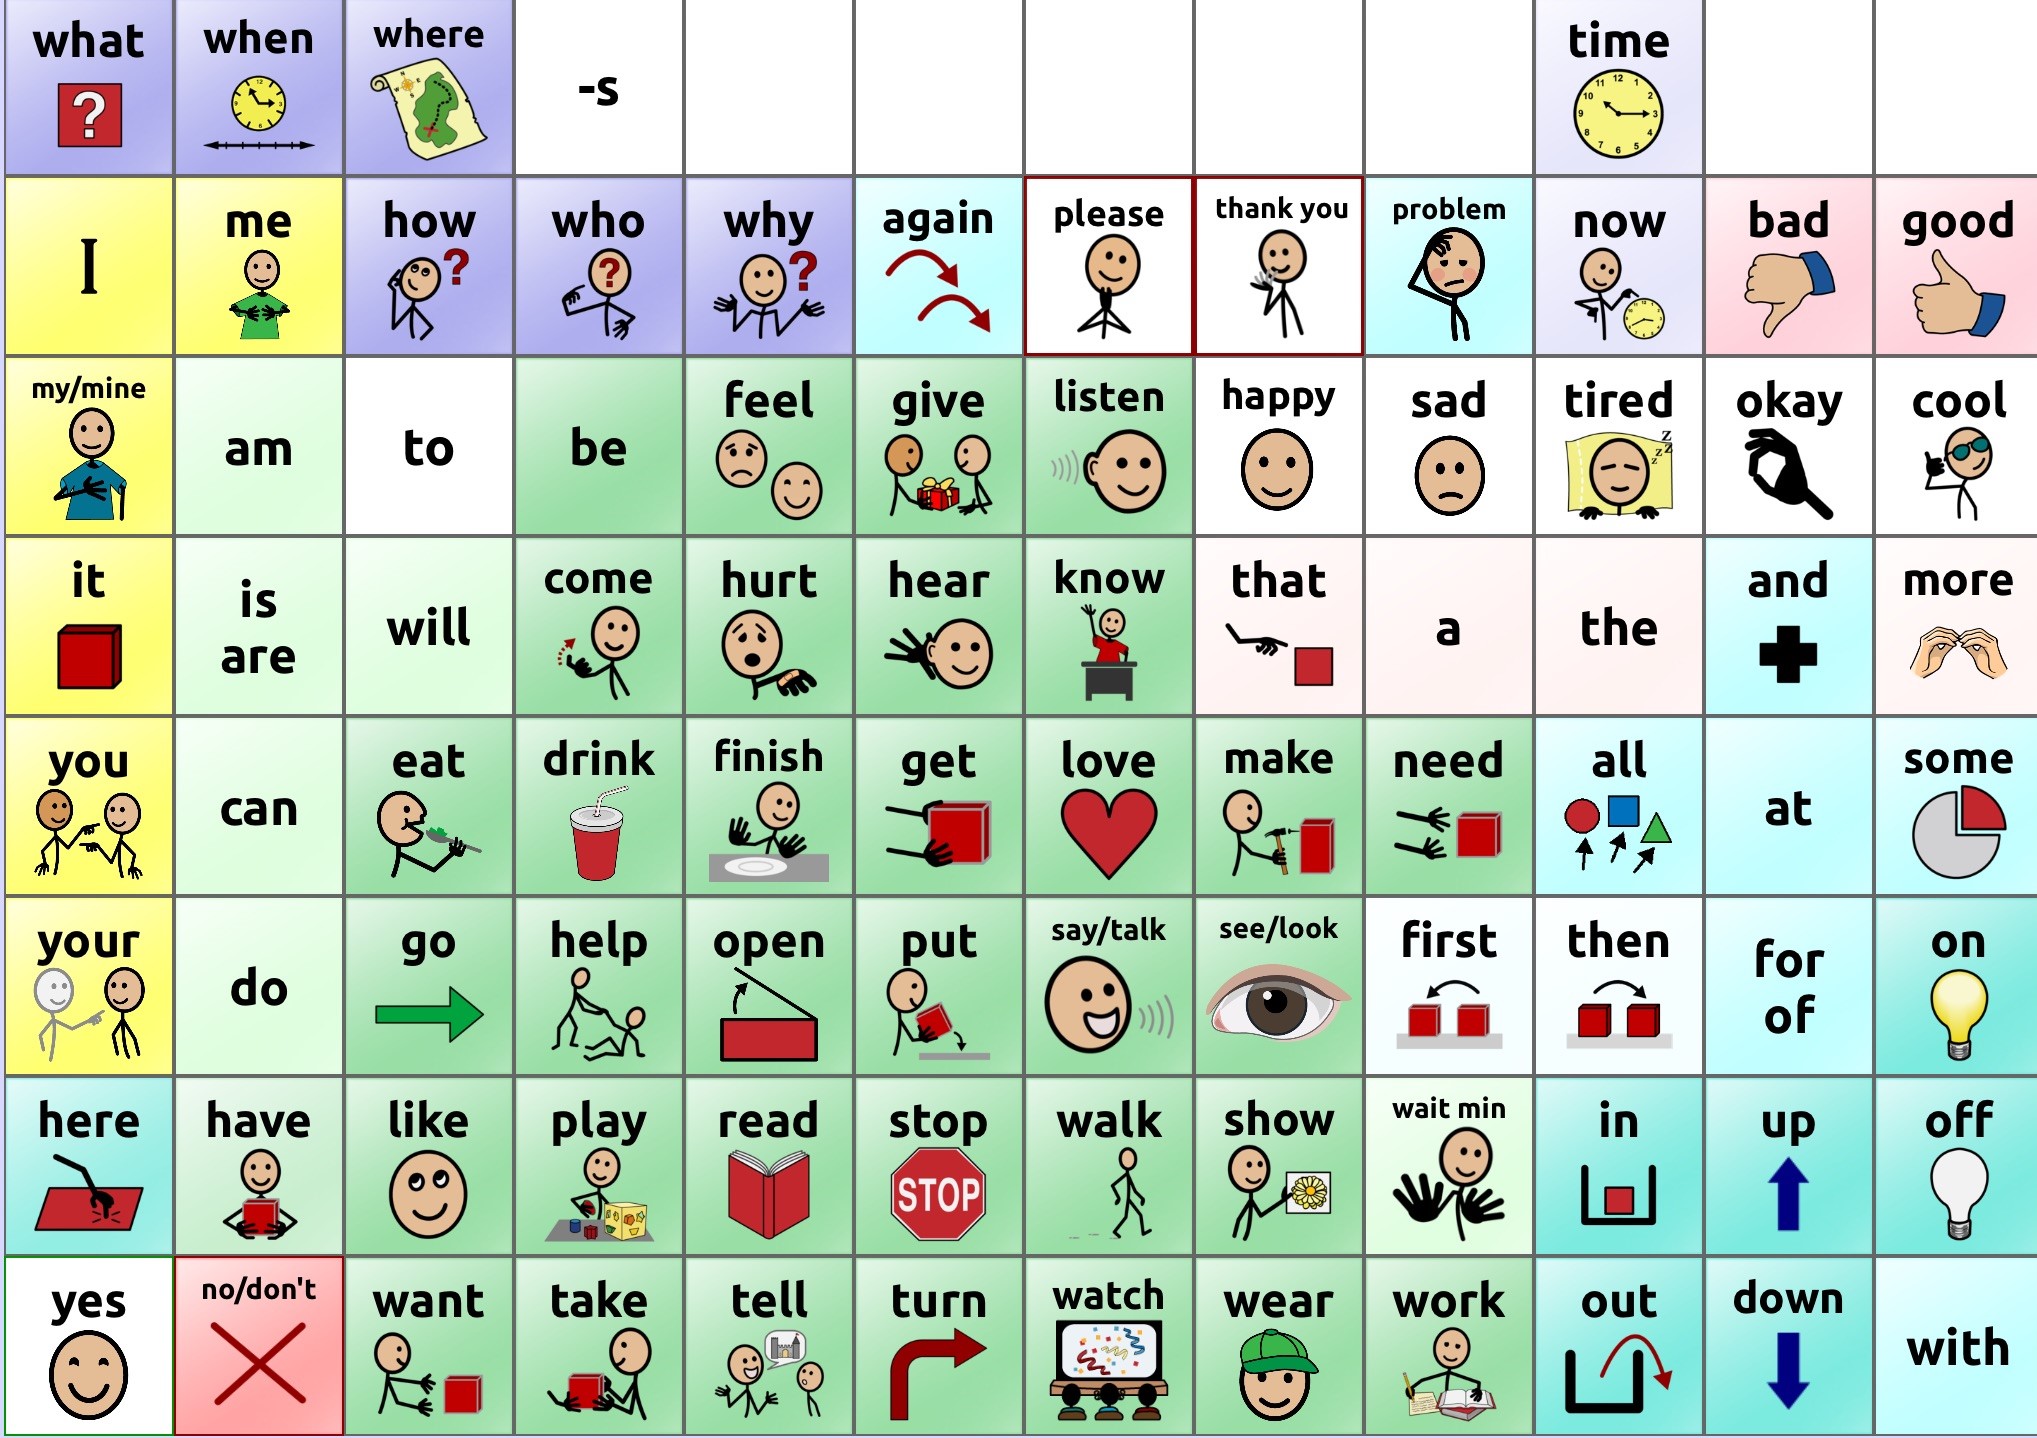
I decided to have the sign made up two-sided. With the first side containing the 96 position coreboard based on the WordPower 60 that we use with my daughter’s NovaChat and TouchChat devices. We have printed out this coreboard from Saltillo and have it everywhere in our house as you can see in my previous blog posts. On the second side I wanted to include not only the main coreboard but additional words that we might want to have handy for our various backyard activities: people, games and toys that we might play with, locations objects and animals we might see, and descriptions we might want to use as well as a qwerty page. These were all screens or buttons that exist or were created in my daughter’s devices via Chat Editor.
I liked the idea of having a simple side in case there ended up being too much on the side with fringe words included. I think it turned out really well – The first day we had the sign up we used it to play with our daughter. We were acting like a train and following her directions on the sign every time looped back to it “go fast”, “go slow”, “go funny”, “go cool” were some of the things she told us to do. She also told us who should be a train together “Mom Dad”, “Maria Grace” and then “4” when she wanted all four of us to go together. 🙂 I am really excited about all the opportunities we have to play with this this summer!
How to Make the Sign:
- Create one or more .jpg images of the right dimensions to be printed on a yard sign at Staples or Office Depot (I have only done this at Office Depot but they are likely similar). The yard sign is 24″ x 18″. (See below for more detail on this step.)
- Go to their website and upload your image(s) to their website selecting the option to “Upload your own design”. Link for Office Depot
- Follow their directions and pay. I did a two-sided sign and added the simple H-stand and regular price it was about $25 but they often have coupons or discounts on their printing services – I think the first sign I printed with them was one sided (regular price ~$15) and I got if for ~$9 because they happened to have signs 40% off that week. Both times that I have made signs they were done within a day or two – it was done same day this time 🙂
Tips on Making the Sign :
- I created my .jpgs in my scrapbooking software to make sure that I had the right dimensions. If you you don’t have scrapbooking software you can probably use PowerPoint to do this as well since the Standard size for a PowerPoint slide is 4:3 (newer versions of Office may offer Widescreen slides as well – but it will still have the 4:3 standard format as an option). You can use this standard size to create the image for your sign and then save your slide as a .jpg that can be uploaded to the Office Depot site.
- To get the coreboards etc. I used the following:
- For the main coreboards I copied the poster .jpg from the Saltillo website’s page of low tech options. I actually used the poster for WordPower60 without categories.
- I then used Chat Editor on my PC to customize pages in my daughter’s vocabulary for “play in the backyard”, and “nature in the backyard”
- One by one for these new pages (as well as her QWERTY page and first descriptions page) I would navigate to the page in Chat Editor on my PC then do a screenshot (Function+Print Screen) then pasted the screenshot into my scrapbook software (or PowerPoint) and cropped the image down to the page of buttons. I did this for each of the the pages I wanted to include with the coreboard.
- Since I had a few open spaces on the original coreboard (since it didn’t include the categories) I used decided to use those spaces for our family members, neighbors, friends, and people. I used the Chat Editor Capture feature to copy and paste those specific buttons on to the sign image as well.
- Once I had everything where I wanted it I saved my image as a .jpg to be uploaded to the Office Depot website.

a fabulous post! thanks so much for this! 🙂
LikeLike
Hello! I would love to get in touch with you about featuring your article in our local AAC magazine here in Australia. If you are interested could you reply and i will PM you my details.
LikeLike
Sure 🙂 you can contact me via email at kristinewitkowski@gmail.com or via Facebook messenger (Kristine Kupiecki Witkowski).
LikeLike